Analog
01100100010102
Hi! You've found the place where I leave tutorial-style notes for various projects and rant about broken computers and how they fail.
Friends

LibreELEC Streaming Camera
Feb 12, 2019
This is a blogpost about a Raspberry Pi camera setup on LibreELEC. It includes a step by step tutorial.
If you have the very specific use case of needing to run LibreELEC on a Raspberry Pi to play media while also streaming a Pi camera, look no further. This setup has been running for the past year or so in my house. I’ve rebuilt the Docker container for it recently, which is the perfect excuse for a blogpost.
LibreELEC is a Linux distribution for running media center software Kodi. It will stream films, music, TV shows from your NAS to your TV and has several awesome add-ons. LibreELEC has no add-on for streaming from a camera. Perhaps because the drivers needed for USB cameras are not actually even compiled into the image for the RPi2. I’ve tried this setup using a USB camera and had to build a custom LibreELEC image.
However, there is support for streaming from RPi cameras and there is a Docker add-on, which can be used to run a simple camera streaming app in a container. The app I’ve chosen after some trial and error of which gruelling details I will spare you is mjpeg-streamer.
The container uses the current Raspbian stable image, stretch, on top of which it builds mjpeg-streamer.
It then uses an entrypoint script to capture a still image per second from the
Pi camera, which the software then turns into a www stream on port 8080.
You can get the container here. For a step by step tutorial on how to deploy this, read on.
Step by step tutorial
Ingredients:
- Raspberry Pi v2 or v3
- Micro SD card (>2GB) and SD card adapter
- Compatible Raspberry Pi camera module
- Monitor and keyboard
- Wired connection or wireless dongle if using a RPi 2
Step 1: Download
Download the official LibreELEC image for the Raspberry Pi from the official website. Scroll to ‘Direct Downloads’, select ‘Raspberry Pi v2 and Raspberry Pi v3’ and click the filename link on the page.
The filename looks like LibreELEC-RPi2.arm-8.2.5.img.gz at the moment of writing this blog post, yours will most likely be newer.
Step 2: Put image on SD card
I use an SD card adapter and the in-built card reader in my laptop. On Linux, after plugging the SD card in, command sudo dmesg should display the name newly inserted device, similar to the following:
ana@sinopia:~|⇒  sudo dmesg
[...]
[70540.504869] mmc0: new high speed SDHC card at address aaaa
[70540.585060] mmcblk0: mmc0:aaaa SB16G 14.8 GiB (ro)
[70540.590225] mmcblk0: p1
The identifier for SD cards on Linux usually looks like mmcblk. Careful to copy your image on the right device, and not on your local hard drive:
ana@cyan:~|⇒  gunzip LibreELEC-RPi2.arm-8.2.5.img.gz
ana@cyan:~|⇒  sudo dd if=LibreELEC-RPi2.arm-8.2.5.img of=/dev/mmcblk0
549+0 records in
549+0 records out
575668224 bytes (576 MB, 549 MiB) copied, 50.8254 s, 11.3 MB/s
This may take a minute or two. Once dd has finished, load up your MicroSD card in your Raspberry Pi.
Step 3: Configure LibreELEC
Plug a monitor and a keyboard in and turn on your RPi. LibreELEC starts an autoconfiguration wizard when it first boots. This will guide you through setting up location, timezone and most importantly, a network connection needed for the next step. Hit ‘Next’ and follow the wizard.
- One you connect to a network, the interface will display your IP address. Make sure to take a note of it.
- Under the initial ‘Sharing and Remote Access’ screen make sure you enable the SSH service.
For security purposes, we will disable SSH after setting up docker as the root password is hardcoded in the image.
Step 4: Download the Docker Add-on
From the left hand-side menu, navigate to Add-ons -> Install from repository -> LibreELEC Add-ons -> Services -> Docker and then select Install.
The interface will notify you once this has installed.
Step 5: Build the Docker container
In order to build and run the docker container, you need to ssh as root into your Pi, using the IP address from Step 3.
In this example, my IP is 192.168.0.156.
ana@cyan:~|⇒  ssh root@172.22.152.253
root@172.22.152.253's password
At the password prompt, type ‘libreelec’, the LibreELEC default and hardcoded password.
Next, make a directory and download the Dockerfile and starting script.
LibreELEC:~ # mkdir mpeg
LibreELEC:~ # cd mpeg
LibreELEC:~/mpeg # wget https://raw.githubusercontent.com/ana-cc/dockerstuffs/master/mjpeg-streamer-rpi/Dockerfile
Connecting to raw.githubusercontent.com (151.101.60.133:443)
Dockerfile           100% |************************************************************************************************************************|   917   0:00:00 ETA
LibreELEC:~/mpeg # wget https://raw.githubusercontent.com/ana-cc/dockerstuffs/master/mjpeg-streamer-rpi/stream_from_pi.sh
Connecting to github.com (140.82.118.3:443)
stream_from_pi.sh    100% |************************************************************************************************************************| 55534   0:00:00 ETA
Inspect and (optionally) edit the stream script. The script uses command raspistill to capture an image per second from the
Pi camera, which mjpeg-streamer then turns into a www stream on port 8080.
You can vary the resolution, quality and time apart these images are taken with the -w -h and sleep values. Here is the script by default:
until raspistill --nopreview -vf -hf -w 640 -h 480 -q 5 -o /tmp/stream/pic.jpg -tl 100 -t 9999999 -th 0:0:0 & LD_LIBRARY_PATH=/usr/local/lib mjpg_streamer -i "input_file.so -f /tmp/stream -n pic.jpg" -o "output_http.so -w /usr/local/www"; do
	sleep 1
done
Finally, build the container and give it an easy to remember tag:
docker build -t mjpeg_container .
This should take a while, at the end your output should be similar to:
[...]
Step 12/13 : COPY stream_from_pi.sh /
 ---> 2299b11e7696
Removing intermediate container de4317561efe
Step 13/13 : ENTRYPOINT /bin/bash /stream_from_pi.sh
 ---> Running in deff3a4ebe15
 ---> b5f669ccd45e
Removing intermediate container deff3a4ebe15
Successfully built b5f669ccd45e
Step 6: Run the docker container
Now for the fun part: running and testing the newly-built container.
We want the Docker process to map the default streaming port to port 8081 of our RPi host (Kodi’s own web interface occupies port 8080 by default):
docker run -d --privileged -p 8081:8080 mjpeg_container
And now the LibreELEC box will present the stream on port 8081. In a browser of choice, navigate to your IP address on port 8081,
for example https//192.168.0.156:8081.
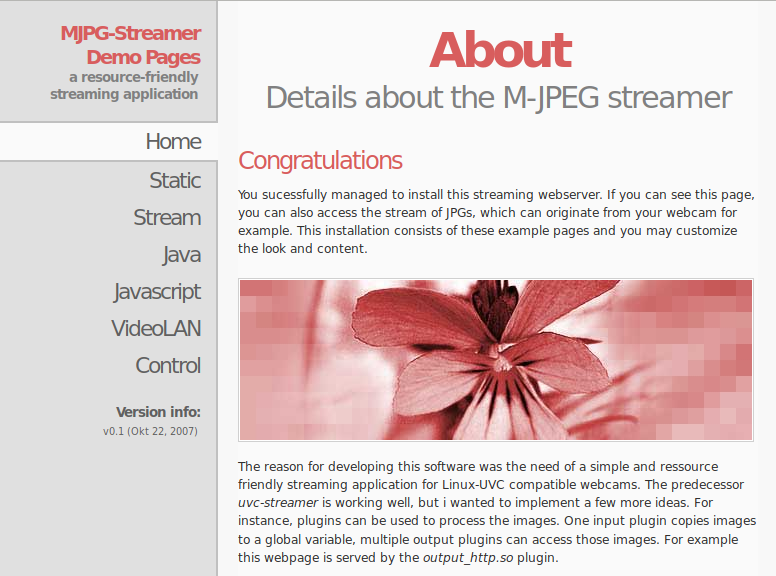
You should see a welcome page like the following:
Step 8: Clean up
- Worth adding an
@rebootcrontab to run the docker command if your box is subject to, uh, a lot of reboots.
Before ending your ssh session:
LibreELEC:~ # crontab -e
Make sure the file contains the following line:
@reboot docker run -d --privileged -p 8081:8080 mjpeg_container
This tells the box to run the docker container at every reboot so that you don’t have to start it manually.
- Finally, disable SSH by going to
Settings -> Servicesin your Kodi navigation.
This concludes the tutorial. Happy streaming!